One of the most attractive accessories you can place on a suit is a pocket square. Simple, elegant, can even seem eccentric (depending on the fabric pattern and color). An interesting pocket square can make you stand out in the crowd of suits, and it gives a personal stamp to a uniform outfit.
However, purchasing a nice and high-quality pocket square can be unnecessarily expensive – after all, it’s just a piece of fabric, and you can make it by yourself. A hand-made pocket square can cost you up to 4 times less money and requires just a little bit of time and effort (as much as going to the store and back, I’d say).
There are a couple of ways to make the perfect pocket square for your suit. Some require sewing, some not, but what’s important is that the result is the same – a personalized pocket square that suits your style.
After testing several different methods of making this accessory, I’ve chosen my favorite two: one that involves sewing and one that doesn’t. Also, I’ve discovered a product that can solve many problems of modern sewists, and I strongly advise purchasing it: hem tape.
Although it’s called tape, and many would expect it to be sticky with glue, it’s actually not at all. It’s technically a roll of glue that looks like tape, but it works only in interaction with heat, meaning that you need to place it on the pieces of fabric you want to bond together and then iron over it. Yes, you read that well – just iron over it, nothing else.
Hem tape is one of the best products of this kind you can use. It is much better than the rolled one that you need to hand sew because it’s difficult to sew it consistently, even if you’re using a sewing machine.
If you’re looking for the fastest and simplest way to make a pocket square, I strongly recommend buying hem tape, and it will make your life so much easier. It works with so many different DIY projects, and it’s particularly useful when you need them fast (making gifts, clothes, house fixing, etc).
But back to pocket squares. This article will share everything I know about making this simple yet practical accessory. I will show you two ways to do it: with and without sewing.
But first, let’s discuss the materials and tools needed to complete this project.
What Do I Need to Make a Pocket Square
This sewing project truly requires minimum supplies. If you’re a DIY crafter in your free time, I’m quite certain you already have everything you need for making a good pocket square.
Here are the bare necessities for this simple sewing project:
A Piece of Fabric
I would strongly recommend cotton, silk, or flannel, as they combine well with almost any material, they are inexpensive to buy and usually have the best patterns. You may have some scrap fabric from your previous sewing projects, but if you don’t, here are some recommendations for purchasing online:
- Kaufman Artisan Batiks Patina – I really love this one for the colorfulness that can easily fit any styling;
- Masterfab Cotton in a floral pattern in dark blue is a good choice if you’re looking for a classy-looking fabric;
- Timeless Treasures quilted cotton is my personal favorite because it adds some boldness and creativity to a classy outfit.
You can literally use even an old shirt to make a pocket square if you don’t want to purchase new fabric. But if you want to buy, you don’t need much – ½ a yard should cover this project even if you make a mistake and need to start over.
Hem Tape
As I mentioned before, hem tape will be of great help for this, but also many other sewing projects you may have.
Heat and Bond is a very good brand, but you may also want to try Attack or Secret Sidekick.Rotary Cutter
If you do not possess one, I would strongly recommend purchasing one as you will for sure need it for your future sewing projects. There are many good rotary cutters you can buy online.
Cutting Mat
Once again, if you’re a DIY-er, you probably have this one already, as those of us who often engage in arts and crafts don’t want to damage our furniture while cutting, gluing, and sewing, which is why we need a proper cutting mat. If you don’t have one yet, check out this excellent, highly affordable cutting mat.
Iron
For this project, you can use any iron really, but if you want to have a good iron for DIY projects, I have a post reviewing the best irons for sewing here.
How to Make a Pocket Square – Step-by-Step Guide (No Sewing)
Finally, the reason why we are here: sewing the pocket square. Here is a simple step-by-step procedure on how to do it. First, I suggest you read through all the steps, prepare your tools and materials, and let the crafting games begin.
Step 1: Cut the Fabric to the Right Size
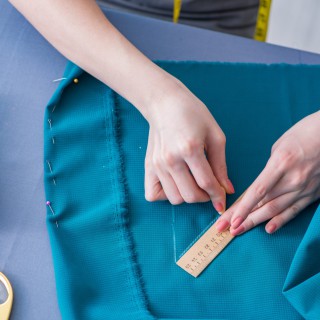
There are many different sizes for a pocket square. You can make it slightly smaller or a perfect fit for your pocket size; make sure not to make a larger square than a pocket. To do that, you need to measure the size of the pocket, width, and depth alike. I usually make 16-inch pocket squares, but for that, I cut 17 inches of fabric so that I have some ½ of an inch space for a hem tape.
Step 2: Cut the Corners of the Square
Now you want to make diagonal cuts on the corners. Measure precisely one inch from each corner and mark the inner side of the fabric (use a fabric marker, fabric chalk, or a plain pencil). Then, use a rotary cutter to chop off the corners. If you don’t have a rotary cutter, scroll up and get yourself one, or at least find a pair of super-sharp scissors for this purpose. You need an excellent cutter because you don’t want to damage the fabric and have loose threads after cutting.
Step 3: Iron and Fold the Fabric
Take an iron or your small steamer and iron the fabric until it’s smooth and flat. Then, make a ½ an inch fold on each side of the square and iron over the fold. At one point, this will become your hem. To make things easier, you can cut a piece of paper that is ½ inch wide, and fold the fabric over it, so that you’re 100% sure that it’s ½ of an inch everywhere along the folding line.
Also, since you’ve cut the corners of your initial fabric piece, it will now be super-easy to make new corners as you fold along each side of the square.
Step 4: Hem Tape Application
Cut a piece of hem tape that will be as long as the length of your fabric now. Also, check how wide the tape is. If it’s more than ½ of an inch, cut it lengthwise as well so that it fits the creases. The tape must fit entirely inside the folded creases because you don’t want it to be visible. This is probably the most challenging step of the pocket square-making process (and it’s still super-easy, right?).
Once you get the tape inside, iron over the fold again, but do it a bit more slowly this time. The tape needs a few seconds to bond. Repeat this on all sides.
Step 5: Wear Your Square
And that’s it. Your pocket square is ready to draw the attention and comments of others!
How to Actually Sew a Pocket Square – Few Alternative Steps
In case you don’t want to work with hem tape, you can use needle and thread.
The first three steps are completely the same: cut the fabric, trim the edges, iron, and fold on the side.
But now, with the first fold that you make, create an additional ¼ of an inch fold so that the raw fabric edge is not exposed. This will help prevent any ripping and fraying of the fabric on its sensitive part – the edges. Also, this move will make the inside of your pocket square look tidier and professionally done. When you do this on all sides, you get the looks of the pocket square that you want to achieve.
Making a Seam
In my experience, sewing a pocket square is best done by hand. It’s super simple and quick, so turning your sewing machine on is completely unnecessary.
The first step is to measure and cut enough thread and attach it to the needle.
Then, pick one corner to begin from and make either a backstitch or a running stitch from one side to the other of the square. In an ideal case, your stitching should be done so that you can only see the thread on the wrong side of the fabric. That way, it will look professionally done. You will achieve it by making narrow stitches on the top side and wide stitches on the bottom side. Each time you should pull the thread together and tighter so that you make a disappearing stitch.
When you reach another corner, instead of cutting the thread and starting over, you can simply sew to the corner center, flip the fabric, and simply proceed to work on the next edge. Continuous stitching will save you time and effort. Repeat this on each edge and finish up by tying a knot at the end and securing the stitch. Tie the knot on the wrong side of the square, and you can cut the thread with a pair of sharp scissors.
Finishing Touches
This step is completely optional, but if you want your pocket square to look even neater, you can use the iron to press the stitched edges and make them flatter.
That’s it – you can go back to step 5 from the previous part and just wear your square!
Final Word
A pocket square for a suit is a super simple DIY project you can do to enjoy, relax, and have fun. It is a great opportunity to practice your hand sewing skills.
A nice pocket square is also a good option for a quick DIY gift for a friend or family member, as you can finish it in less than 1 hour. The more skilled you become, the less time you’ll need.
For more sewing tutorials, check out the how-to section of my website.
Last update on 2025-04-22 / Affiliate links / Images from Amazon Product Advertising API


