Welcome to one of my absolute favorites when it comes to sewing projects. There is absolutely no wrong occasion for wearing a bow tie, and there are so many options for making the most fantastic bow tie you can imagine.
Bow ties are a great addition to the outfit to both men and women, boys and girls, but you can also sew a nice bow tie for your cat or dog (just on a smaller scale) and some pizzazz to their everyday looks.
I find these so much better than ties because they are, at the same time, formal and relaxed, and they are easy to combine with almost any kind of outfit. They are also much easier to keep clean, as you can simply wash them quickly by hand or in the washing machine without worrying too much that they will deform (not the case with ties).
Bow ties give you so much room to express your creativity, be eccentric, and have fun with your clothing. For example, just check out Mo’s Bows – handcrafted bow ties. You will notice that the bow tie adds everything to the outfit, from class and seriousness to some laid-back and relaxed elegance.
They are also fun and easy to make, and I am looking forward to sharing everything I know about making and wearing a bow tie with you.
What Do I Need to Make a Bow Tie?
You may think that making a bow tie requires special materials, tools, and attention due to their majestic outside looks, but the fact is that you only need the basic stuff.
The most important thing to have is the fabric. You can make a bow tie out of literally any material. The thing is that you will also need to use the decor fuse stabilizer, which means that no matter how soft or slippery the material you choose, it’s going to work just fine. All you need to think about is the fabric design.
You need around ¼ of a yard of fabric. I suggest cotton because it has the most interesting patterns, it’s inexpensive, and you can easily find it online.
My personal favorites for bow ties are tiny floral patterns, which look very elegant combined with uni-colored dresses and shirts, a bit larger Japanese floral designs on dark surfaces, animal and dotted print, as well as children-friendly prints. However, you may also prefer single-color fabrics, which are more suitable if your outfit is already patterned or colorful.
Besides the fabric, you’ll also need an iron and an ironing board. If you don’t already have them, I suggest going with a small steam iron and this simple to unfold and fold ironing board.
Before you start sewing, it’s important that you find a thread that well-matches the fabric you’ve chosen, so I recommend having a multicolored set of threads at your disposal.
Now, there is also a pair of sharp tailoring scissors and a bow tie pattern. You can find plenty of creative bow tie pattern solutions on Pinterest.
How to Sew a Bow Tie – Step-by-Step Guide
As you probably know already, the most important part of any sewing project is the proper preparation. If you have all of the materials and tools ready, it’s time to move to the next part – the actual sewing of the bow tie.
Step 1: The Bow Tie Pattern
Before you start sewing your bowtie, you should carefully choose the sewing pattern you want to use for it. Print it out in proper size – do not scale it before printing. The best material to print the pattern on would probably be a thick piece of paper or cardboard.
Once you have your pattern printed out, cut it out with scissors. Pay attention to the lines that indicate the neck size. When you get it all cut out, tape the pieces together to form a single piece with the collar and the bow part.
Step 2: Cut and Iron
Once your pattern is ready, it’s time to prepare the fabric for sewing. That means – cutting and ironing. The fabric should be as flat as possible. First, iron the fabric so that you remove any wrinkles or bubbles. The steam iron I suggested for this purpose does miracles as it warms up super-quickly and makes your fabrics flat in 5-10 minutes.
Before you start ironing, align the two pieces that should interface together and pin them to the two pieces of the outer fabric. Then iron.
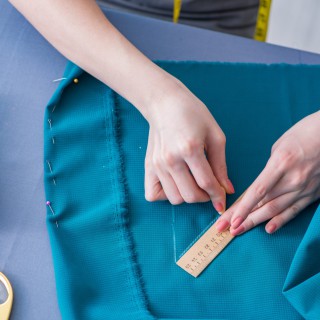
Once the fabric is nicely ironed, take the pattern and apply it to the fabric and the interface. Cut out four pieces – two of each.
Step 3: Sew the Bow Tie
By the time you have reached this step, you should have certain bow tie elements ready for sewing. Let’s recap on what should be ready by now:
- There should be four pieces of fabric cut in the bow tie pattern.
- Two of them should be ironed together to the interfacing fabric, and two should not.
Take two pieces of the pieces that match. Place them right sides facing each other. Sew their right sides together on the “skinnier” end side.
As you sew, make sure to leave at least ¼ of an inch of the seam allowance. When you’re done with the first pair, repeat the same procedure with the second pair.
When you are successfully done with this step, you should have 2 long pieces of bow tie that you should now pin together so that the backside is facing up.
Sew around the tie perimeter but make sure to leave at least ¼ of an inch of seam allowance and a 3-5 inches wide gap in the middle part. You will use that gap later to flip the bow tie so that the right side is facing up.
Step 4: Flipping the Bow Tie
Now you’re almost at the end of your bow tie sewing project! Before you reveal the actual looks of the bow tie, make sure to clip the corners of its tie so that it has some sharp edges.
Then, to flip the bow tie, you’ll need to pinch it and use a small stick or a pencil to separate the material, because the bow tie is so small, and it may be difficult to do this with fingers solely. You can also use a knife sharpener or page separator – basically, any object that looks like a stick should work. Ensure that the top of the thing or the part that will enter the fabric is not too sharp, as you don’t want to damage the bow tie.
When you manage to get the stick in, you should use it to push the ends throughout the middle gap. You should scrunch it until it goes through. Repeat on both sides while scrunching the fabric over the stick. When you’re finished, the bow tie should have an S-shaped wrinkly blob.
You may be scared at this point that this is what your bow tie will look like… don’t worry, it won’t. Take the iron again and flatten that fabric blob. Pull out all crevices while ironing with a pair of tweezers.
Step 5: Close the Gap
Finally, close that gap you used for flipping the bow tie. Do that by folding its edges some ¼ of an inch inward and then ironing the edges completely flat.
Find a piece of matching thread and sew the gap.
Step 6: Put on Your Bow Tie and Admire It
Finally, it’s finished. Put on your bow tie together with a matching shirt and enjoy your masterpiece!
Final Word
Sewing a bow tie is an excellent occasion to practice smaller-scale sewing projects, which require precision, focus, and attention. It’s also a good way to level from beginner’s projects to intermediate ones, as this is an excellent middle step.
Furthermore, bow ties are great for almost any occasion, so you can never have too many of those, but they also make for a very nice and tasteful gift for a dear person.
I hope you have enjoyed my bow tie sewing tutorial. For more similar content, pay a visit to my website’s how-to page.
Last update on 2025-04-22 / Affiliate links / Images from Amazon Product Advertising API


