Are you searching for a way to make your home more cheerful-looking during the gray and white seasons?
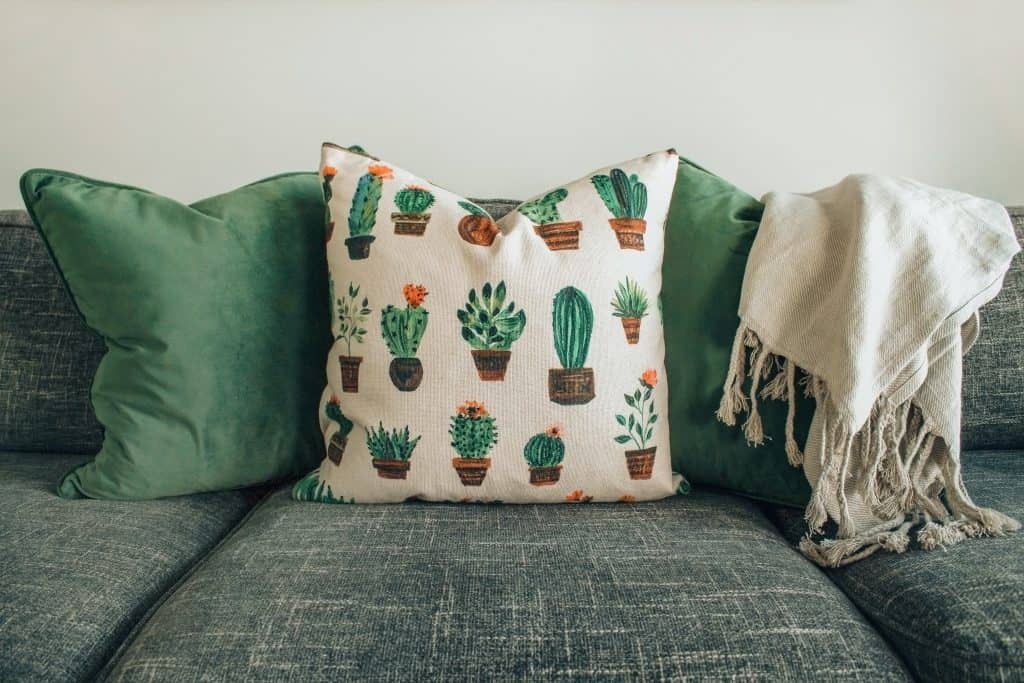
Regardless of whether you live in a small apartment, a huge house, or something in between, a colorful throw blanket can do miracles when it comes to making an indoor space home with identity.
If you also decide to decorate it and sew some embroidery, applique, or maybe pom-pom trim, you can say goodbye to the monotonous IKEA living room, and say hello to some authenticity and pizzaz.
Thanks to blankets becoming popular again, you can find them everywhere: online shopping, shopping in physical furniture and housing stores, second-hand shops – everyone today is selling and buying blankets!
Why is this great?
What’s the Deal With Throw Blankets?
First, the thing about blankets is that they make us feel safe. Everywhere in the world, in China, Australia, and America alike, people like to roll themselves in a blanket during a cold day and enjoy a hot drink while watching Netflix.
A throw blanket is also an excellent gift for a friend. With a little bit of effort with decoration, you can make a close friend very happy with this authentic gift.
You can also never have too many of these. Throw blankets are good for covering your furniture, you can give them to your guests, and also have a set of blankets you only use for travel/camping.
Furthermore, even if you’re not an experienced sewist, you can still succeed at making a throw blanket, because it’s super-easy. Reading through this tutorial should be enough to help you grasp the making of a throw blanket.
Finally, the piece is very light on your wallet too. Materials cost next to nothing, and I guarantee you’ll have a lot of fun.
One of the main reasons why I love easy sewing projects that are friendly for beginners is that they allow you to express yourself and your creativity to the fullest.
The Making of a Throw Blanket: Step-by-Step Guide
So, let’s dig in.
I will now give my best to provide you with the simplest and the most accurate tutorial possible on how to make a throw blanket.
Step 1: Supplies
Even if you’re inexperienced (or especially in that case!) you should know that preparation is a job half done when it comes to sewing.
No one wants to start with their project only to discover that they lack proper thread, a needle, or fabric.
That’s why I strongly recommend you to gear up before everything else!
Here are the most important supplies to have before you start sewing your throw blanket.
- Blanket fabric: you can either use a single piece of fabric, or you can purchase two pieces and make a double-sided blanket. The advantage of making a double-sided blanket is that you can pick the pattern design that you like, but if that fabric doesn’t feel good on your skin, simply pin and sew another piece of fabric of the same size on the other side of the patterned fabric that you’d actually like to snuggle with.
- A ruler;
- A cutting mat;
- A rotary cutter or a pair of sharp scissors (however, I would rather recommend a rotary cutter);
- Fabric chalk or marker;
- A hand vacuum cleaner (there will be a lot of fuzz around!);
- Pins;
- Sewing machine;
- Decoration of your choice (I would go with pom-poms, I love them).
Where Do I Purchase the Supplies?
If you’ve been visiting my website earlier, you probably know how big of a fan of online shopping I am. I just appreciate it so much that I can measure everything and order supplies I need from the comfort of my home.
That’s why I complete most of my shopping (especially when it comes to sewing supplies) on Amazon.
So, let’s dig into the fabrics first, as that is the most important decision you have to make before you start with this sewing project.
Blanket Fabric by the Yard
Here are some of my favorite blanket fabric suppliers on Amazon. I will list here both uni-colored and colorful or patterned fabric designs. I suggest you take a look and then decide what would work best for you.
Shannon Fabrics 3D Dotted Fabric
Made of 100% soft polyester, this fabric comes in a baby pink color. It’s ideal for those who prefer gentle tones in their home. The fabric is 60” wide and you choose the length, of course. Keep in mind that polyester is not iron-friendly and you should always cold wash it.
Timeless Treasures Tribal Pattern Blanket Fabric
On the other hand, if you’re a fan of strong colors, perhaps this 100% cotton fabric with a tribal pattern print will suit your taste better. Width: 44”.
Unicolor Blanket Polyester Wool by Fabric Empire
If you’re planning on doing the decorations by yourself (I hope you are planning to decorate your throw blanket!), a unicolor fabric piece might be a better choice.
Polyester wool in general feels nice on the skin, although my personal favorites are materials slightly fluffier than this one. If you visit this retailer’s Amazon page, you’ll see that you can choose between 27 colors, which is a huge plus.
The fabric is around 58” wide.
Windham Fabrics Elephant Print Blanket Fabric
If you’re looking for a piece of fabric that’s both children and adults-friendly, this one might be a good choice. Cute elephants can be an amazing decoration for a child’s room, and the good news is that the print is gender-neutral. On the other hand, I totally see a grown-up person rolling into this blanket. This print is so cozy it looks good everywhere.
The fabric is 100% polyester wool and it’s 60” wide.
Newcastle Fabric Classic Blanket Fabric
Many decades ago, almost every household used to have a blanket with this pattern. A simple black and red grid is a nice vintage detail to a modern household.
The fabric is made of 100% polyester wool and it’s 58” wide.
Spoonflower Children Blanket Fabric
If you’re making a throw blanket for a child, . Made of soft fleece wool, this material is a great option for a child’s room. The print is gender-neutral with some typical forest animals just being cute.
The fabric is 56” wide.
Barcelonetta Fabrics
If you visit this retailer’s Amazon shop, you’ll discover that they offer a wide variety of fabrics ideal for blankets. I loved the black-and-white animal print ones, but you can also pick some uni-color and children-friendly prints.
This producer doesn’t have unlimited fabric length. The width is 4.9ft, but the length is 5.9ft.
Spoonflower Dalmatian Print Blanket Fabric
If you’re a fan of 101 Dalmatians and Cruella De Vil’s taste, but you don’t want to hurt any cute doggos, here’s a solution for you.
I absolutely adore this and I think you will too. You can order it either in fat quarter size or per yard.
Springs Creative Products Baby Yoda Blanket Fabric
Fan of Star Wars? Don’t miss out on this that will absolutely enrich any true Star Wars fan’s home.
Besides the coolest print ever, this fabric’s huge benefit is that it’s made of 100% soft cotton. Fabric width is around 44”, so a bit smaller than usual.
EZ Fabrics Swan Print Pink Fabric
Another great piece for those who enjoy calmer patterns. This 100% polyester blanket fabriccomes in baby pink color and it’s fully covered with tiny swans.
It works well for adults, teens, and children alike, as you can really combine this one with almost any room decor.
Michael Miller Minky Floriana Marine Fabric
Besides the cute, funky, or uni-colored blankets, there’s also an elegant option for those who prefer a rather serious design.
This floral blue and white print is easily combined with any type of furniture. The fabric is 100% polyester and it’s the standard 60” wide.
Spoonflower Tella Autumn Design
This is one of the coolest autumn patterns I could find while shopping for blanket fabric online. Covered with pumpkins, and with colors of nature being dominant, this fabric is 100% soft polyester, some 54” wide.
It’s a great gift for friends or family members born in the autumn months and you can also use it for adults and kids alike.
Unicolor Pre Cut Cotton Fabric
If you’re looking for a cheaper option, and perhaps a variety of colors to purchase for your throw blanket, this might be the best choice, as these fabrics come in more than 50 different colors.
The Rest of the Supplies
The list of blanket fabrics was long, I know, but I wanted to give you a large list of options to choose from. When it comes to other sewing supplies, the choices are much more narrow, and I will only list briefly those that I usually use. I will skip the needles, pins, and scissors as minor supplies you probably already have, and in case you’re looking for a good sewing machine, please check out our sewing machine reviews.
Rotary Cutter
Cutting Mat
Step 2: Cutting the Fabric
So, by the time you’ve reached this step, you’ve probably finally chosen your preferred material and you’re ready to take on the challenge of turning it into a throw blanket.
The size of your fabric depends big time on the width of fabric you’ve chosen. If you picked a standard 60” wide fabric, I would suggest cutting your fabric lengthwise by some 50-70”, but of course, it’s up to you and your further intentions with the blanket.
Even if you have a pair of sharp tailor scissors, I would still recommend cutting this type of fabric with a rotary cutter. It’s more precise and allows you to make clean, straight lines in a matter of seconds. Blanket fabric can be a bit slippery or thick which makes it difficult to cut with scissors.
However, if you are using the rotary cutter, make sure to place a cutting mat below the fabric, so you don’t damage the table or other working surface.
When you cut off the desired piece lengthwise, expect to see a lot of fuzz. This is why you need a small vacuum at hand – to clean up all the excess thread and fuzz and avoid making a huge mess, because as you know, fuzz is very light, and it can travel around your home.
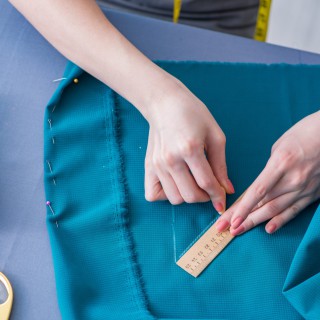
Also, when you cut with the rotary cutter, make sure to cut along the ruler. This way, your line will be more precise, and you’ll keep your fingers protected from a potential injury.
Step 3: Decoration
There are so many ways to decorate a throw blanket. Decorative buttons, strips, embroidery, pom-poms – options are endless.
I will share with you some of my favorite suggestions, but you can also try some other techniques that you’d maybe like better.
Decorative Buttons
Decorative buttons come in so many different shapes and sizes, that you can not make a mistake if you decide to go with this decoration style.
The buttons with holes are usually easy to sew, but if you don’t know how just follow this simple instructional video. If you’re dealing with shank type of buttons, then use this video.
There are so many things you can do with decorative buttons. You can place a single button somewhere on the blanket, but you can also use them to decorate the corners or sew them along the sides of your blanket.
Check out these ideas for quilting with buttons and get some inspiration for your own button design.
Also, if you’d like to purchase some decorative buttons, here are some recommendations:
- Akoak Maple Leaf Tribal Pattern 50 Buttons Set;
- Anchrisly Round Sewing Buttons Floral and Tribal Pattern Design;
- C & Xanadu Store 50 Vintage Style Metal Buttons;
- Mahaohao Floral and Abstract Pattern Design 100 Wooden Buttons;
- Willbond Decoration Buttons for Children.
Sewing Pom-Poms
A bit more advanced, but still a great way to decorate your throw blanket. In my opinion, pom-pom trim looks best if you add it to the short ends of your blanket. However, if you’re a huge fan of pom-poms, you can also sew them along the longer side or along each side.
When you cut your pom-pom strip use the pins to attach it to the fabric edge. Pom-pom strips (or trims) are so much better than making or purchasing individual pom-pom pieces and then sewing them one by one – that’s too much work! The tape side of the pom-pom strip should be lined up with the edge of the fabric and the pom-poms should be facing in.
You may think that this is wrong, but keep in mind that the raw edge will always end up inside the fabric when you turn it inside out. That’s how your pom-poms will also end up facing outside instead of inside, once you finish your blanket.
When you’re done pinning, sew down the pom-pom strip slowly so you don’t damage the pom-poms.
Embroidery
Another amazing option for blanket decoration is, of course, embroidery. Just choose the applique you want and have fun sewing it into your blanket.
Step 4: Sewing the Fabrics Together
This step is not mandatory. You should take this step only if you chose to make a double-sided blanket (which I would honestly recommend much rather than making a single-side one).
Place the two fabrics facing each other, pin the bottom and top piece of each fabric together, and tuck the pom-poms inside (if you decided to attach them) so you don’t sew them too.
Use a ¼” inch seam allowance (or a bit more) and starting sewing on the sides where you have pom-poms. Encase the entire pom-pom tape so it remains invisible when you finish the blanket.
Then, sew the sides. Stop sewing some 18” before you finish the last side. Use this hole to flip the blanket inside out and make sure that no pom-pom is misplaced and that the tape is not visible.
If everything looks good, flip the blanket back in, and trim the corners in a diagonal fashion to make them look neat. Flip the blanket again push the corners out with a pencil so they look sharp.
Step 5: Sew the Opening
First, take the raw edges of the opening of the blanket and fold them into the blanket’s corners.
Use the pins to keep these edges in one place. Use a narrow hem to sew closed the opening.
Step 6: Quilting the Blanket
Maybe your blanket seemed finished in the previous step, but there’s one more thing to do: quilting the throw blanket.
This means you’ll need to stitch a few patterns to make the top side and the bottom side hold together.
You can either sew a 2.5” border edge by attaching a piece of masking tape on your machine to serve as a guide, or you can add some designs in the middle. If you decide on the latter, make a straightedge using a fabric marker or fabric chalk to draw the lines and then sew alongside these lines.
Voila – your throw blanket is ready for use!
Additional Tips: How to Decorate My Home With a Throw Blanket?
Here are a few tips on how to decorate your space with a throw blanket you just made. Depending on the type of your living space, colors, size, and style, you’ll find different methods of decorating more or less suitable for your needs.
Drape It on the Sofa Seat
Put your throw blanket on the sofa so that it covers both the seat and the backrest. Scrunch it a little bit so it seems as if it was effortlessly tossed there.
The other option is to place it on the seat but under a pillow so it stays in one place.
Drape It on a Bench
If you have a bench in your room (perhaps by the living room fireplace, or elsewhere, you can also leave the throw blanket on the bench and place some additional decor next to it.
Place it on the Back of the Sofa
Another option is to leave the throw blanket hanging from the backside of the sofa. It looks even cooler if its edges slightly touch the floor.
Place It on a Dining Chair
If the colors match, put your throw blanket casually on a dining chair. Sometimes you’ll also want to read a newspaper or a book and sip some coffee at the dining table, and you may find the proximity of your throw blanket very handy.
Drape or Fold It at the Foot of the Bed
You can throw the blanket at the foot of the bed if you prefer a messier look, or nicely fold it for a rather neat aesthetic.
Following the examples given above, you can either fold or drape your blanket anywhere you find it fitting: lounge chair, bedroom, living room, even hallway. If you have a designated reading/chill corner in your home, you can decorate and make that corner cozier by adding a throw blanket there.
Conclusion
Well, that’s all from me. I hope you had fun making and decorating your throw blanket. For more tutorials and sewing product reviews, feel free to explore the rest of my website.
There, you’ll find all kinds of tutorials, from fixing a large hole in a leather couch to hem dressing by hand.
Last update on 2025-04-22 / Affiliate links / Images from Amazon Product Advertising API


