Is there a cuter image than pulling your dazzled smiling kiddo out after their bubbly bath and slipping them into their favorite hooded towel?
I would say this fits into the top 10 cutest things parents experience with their toddlers, so we all want to enjoy this moment as long as we can.
However, as you all know, time flies when they are little and in a blink of an eye the hoodie can no longer fit their heads and you can no longer wrap them in the towel!
A child outgrowing their baby hooded towel is such an ambiguous event: it gives you happiness goosebumps to see them grow up, but it also means less and less of these cute moments.
We parents tend to hold on to this sweetness, and we want our babies to stay tiny as long as possible.
Well, what if I told you that it’s possible to keep this moment at least a little bit moment?
Yes, you read this well. In this article, I will teach you how to make a hooded towel for your 22-year-old toddler! Of course, this is a joke, although it would be funny to see a throwback photo of a grown person 20 years later in a giant hooded towel (do I smell an online challenge here?).
Let’s jump to the tutorial and see how you can make as many hooded towels of any size you wish.
What do I Need to Make a Hooded Towel?
As usual, I will start with the supplies and preparation. When you’re starting with any sewing project it’s crucial to make good preparation. If you begin sewing, and realize you’re short on some tools or fabric in the middle of the project it can be quite tricky to pull yourself out of this situation. And it doesn’t take a professional to get of this as much as it takes a professional to get ready properly.
So, here is what you need:
- One regular bath towel (as big as you wish);
- One coordinating hand towel;
- A universal thread whose color matches the one on your towels;
- A sewing machine;
- A measuring tape;
- A pair of sharp scissors or other cutting tools of your preference;
- Sewing pins.
Where to Get Your Supplies and Materials?
If you’ve been reading my articles before, you’ve figured out that I adore sewing, but hate going shopping. That’s why I try to purchase everything I could possibly need for my projects online.
The online retail platform that has never let me down so far is definitely Amazon, which is why I strongly recommended it. You will enjoy quick delivery and a variety of choices in one of the largest online shopping centers in the world.
Here are some of the towels I used for my hooded towel projects.
Zenit Deluxe Set
Made of 100% cotton, this warm and elegant blueberry-colored 2-towel set is an excellent choice for a long-lasting hooded towel for your little one. It’s definitely oversized at 70” in length and 40” in width, but you’ll be able to wrap your toddler like a burrito in this one, and when they grow up, I bet they’ll still have (and be able to fit in!) the towel you made for them.
Glamburg
This is an eight-towel set that covers everything you need for making multi-size hooded towels. There are two smaller hand towels that you’ll need, but also 2×2 towels of different sizes. The middle-size one is a great choice for a baby hooded towel, but the larger one can be used for a much longer time in your kid’s life.
This set comes in gray color, so the good side is that it’s gender-neutral, but if you’d like to live it up a bit, you can always add some embroidery
White Classic 4-Towel Set
This fluffy towel set comes with two gray and two white towels, each of them 54” long and 27” wide. They make an excellent choice for making a large, long-lasting hooded towel for your little one.
Cotton Craft Spun Cotton 4-Towel Set
Sometimes simplicity is the best policy. A set of four fluffy white towels by Craft Cotton gives you complete freedom when it comes to designing the perfect hooded towel for your child. The towels are pretty big, 30” x 58”, so your kid will be able to fit in them for a very long time.
JML Two Oversized Towels Set
Made of 100% coral wool, these towels are the perfect option in wintertime. The size of each towel is 30” x 60”, and despite being made of wool, they are highly absorbing and lightweight.
You can wash them at high temperatures, without fearing deformation or color loss. The towel feels gentle on the skin and will protect your toddler from the cold during winter days.
Handtowel Set
Finally, once you pick a set of big towels, you’ll also need the coordinating hand towels, so here’s one set of for a great price I would most definitely recommend.
The good side to this retailer is that you can choose from more than 10 colors, so whichever color you choose for the big towel, you can complement it with the small one without effort.
The Making of the Hooded Towel
Finally, the instructions.
The easiest way to make a hooded towel is to start with the hood.
How to Make a Hood for the Hooded Towel
If you were wondering what was the hand towel for, well, here’s your answer – it’s for the hood!
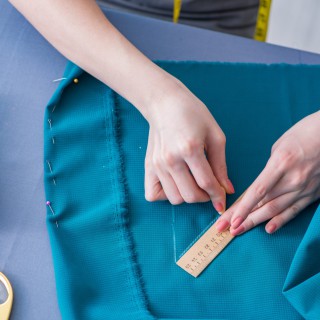
Begin by folding your hand towel in half, matching the short sides. Then use the measuring tape to measure 11.5” from the fold. All the fabric that falls below the 11.5” is excess fabric. Use your scissors, rotary cutter, or other cutting tools to get rid of it.
Open the folded towel and fold 1.5” again but on the longer side.
Then, make a straight stitch along your fold and just below the finished edge.
For a rather professional look, sew again on top of the finished edge.
Now, fold your hand towel once again, this time matching the shorter sides. Place the long edge you’ve just finished working on on the inside. When you finish with this towel, that will be the front side of the hood.
Get the measuring tape again and use fabric chalk or marker to mark the 8” along the top edge and 12” along the bottom. Make a diagonal cut there. There will be some triangle-shaped excess fabric – don’t throw it. You can use it to make pockets when you’re done with everything else.
Now, take your sewing pins, and connect the diagonal edges with them. A zig-zag overlock stitch with a ¼” allowance is a great choice for sewing these two together. Then, turn the hood inside out so the right side is finally out.
Attaching the Hood
Now, take the big towel. Find its top inner center and use the pins to attach the bottom center of the hood to the upper center of the big towel. The overlap should be around ½”.
The next step is to pin the remaining edges of the hood to the big towel’s top edge. You might need to fold the hood a bit so the straight edges align.
Now sew alongside the pins using a zig-zag or overlock stitch. Leave ¼” seam allowance. If you take a look below, you’ll see how these stitches form a wonderful flat seam.
Finally, use your fingers to fold the top edge of the big towel a bit, and there, you’ll find a small flap. Sew this flap down alongside the hood.
Voila – you’ve made a hooded towel! If you’re pleased with the way it looks, you can stop right there. But, you can also sew the tiny pockets on the side.
Sewing the Pockets on the Hooded Towel
Remember the triangle-shaped excess fabric from cutting the hand towel? Use these two pieces to make little pockets on both sides of the large towel.
First, measure some 8” from the top and off the bottoms of the triangles. This should leave you with two trapezoid-shaped fabric pieces. Make an overlock or zig-zag stitch along the diagonal of the trapezoid, so the pockets don’t fray over time.
Turn the big towel on the inner side, and place the pockets on the top corner. Use the pins to keep it in place.
Once again, use the overlock or zig-zag stitch alongside the pins and stitch all three sides of the pockets. The diagonal side should remain open. Repeat this on both sides.
And – you’re done. You have the perfect, fluffy, properly sized hooded towel to burrito up your kid after a bath!
Of course, if you’d like to step up your game, you can add some decoration to the towel for additional fun and a more authentic look.
Decorating the Towel
In this section, I will give you some tips on how to decorate your kid’s hooded towel. I won’t be getting into too many details on how to make each of these decorations step-by-step, as there are separate tutorials for these.
I will give you some ideas and an outline on how to complete them. The most complicated one is definitely embroidery, but maybe you already know how to do it, or you’d leave this task to someone else. The other decorative techniques I’ll suggest fall under the easy sewing projects category.
Artistic Applique With Fabric Scraps
I am a huge opponent of throwing away excess fabric. Besides this being an unnecessary cost, throwing fabric is also not very environmental-friendly.
There are so many ways to use excess fabric from old projects, and creating an artistic applique is one of them.
Simply take your scraps and cut them into decorative shapes: birds, flowers, hearts, leaves, geometric shapes, fruit, letters (initials), whatever works best for you.
If you want to make a flat applique, simply affix the fabric to the towel using an iron. For a 3D effect, you should baste the pieces to the towel and leave small openings so you can fill them with stuffing later.
Once all of your pieces are attached, sew around the cut edges to hide them. Use an applique or zig-zag stitch.
Simple Banding
Another simple solution is to make decorative basic banding using two strips of leftover fabric from some of your previous projects. Cut them 2.5 inches in width and some ½ inch longer than the width of your towel.
Then, fold each strip some ⅜ inch, towards the wrong side of your fabric, and over short ends. Iron the newly created fold. Then, repeat this with the long ends.
Secure the strips some 2 inches from the short endings of the towel using straight pins. This way, the banding strips will be parallel to the ends. Finally, make a top stitch around the banding strips some ⅛ of an inch from the edge.
If you decide to use more than one type of fabric for your bands, first sew the fabrics together lengthwise and with wrong sides together. That’s how you make the strips. Then, go through the described procedure.
If you decide to go with this method, I would encourage you to get creative and free your artistic spirit when it comes to choosing the fabrics for the strips. After all, the towel is intended for a child, so the colorful and inspiring, the better.
Adding Ruffles
A shirred or pleated ruffle added at each end of a plain-colored hooded towel can give life to your creation. All you need is a ruffle in double-width of your towel, plus another inch for the hem. Length is completely up to you. You can experiment a bit and see what’s the best fit for your taste. Once you choose the length, you should double that size, so that there’s no wrong side of the ruffle.
Then you can cut it and sew a 1/2 an inch hem on both short ends of the towel. Make a lengthwise fold next. If you want the ruffle to look shirred, simply use a gathering thread to narrow it down to the towel width, but if you want your ruffles to be pleated, you can simply iron the pleats.
After pinning the ruffles, you need to make a banding strip that’s ½ an inch thick along with a ¼ of an inch side hem fold on all sides.
Then, take the banding strip and pin it along the upper edge of the ruffle and mask the cut ends.
Finally, topstitch the ruffle to the towel.
Tassels
Now, I know that you can always hang a hooded towel by the hood, but to be honest, I wouldn’t recommend this, especially not when the towel is wet and heavy, as the hood may rip.
Instead, you can add tassels to decorate the towel and use them to hang the towel by the tassel.
For making tassels you’ll need 24 fabric strips 8 inches long and ½ an inch wide. You can use a mixture of fabrics and colors, or use a single fabric if you prefer. Pile all the strips in a cluster, except two, and align the short edges. Fold the cluster in half by width.
Then, take one of the remaining strips and knot it around the cluster 1 inch from the folding point.
Finish the tassel by threading the last strip through the loop that remains after the width fold. Knot the strip.
Considering that the tassels don’t do well in the washing machine, affix them with some sew-on snaps or tape dots.
Embroidery
Finally, if you used a single-colored towel and you’d prefer it to be colorful and child-friendly, you can make embroidery to live it up.
I won’t be going into details about embroidery techniques, as this would require a separate article. However, you can consider either sewing an interesting image of your choice, such as your child’s favorite fruit or cartoon character, or you can make small decorations on the borders of the towel.
If you don’t know how to do embroidery, but do want to apply this type of decoration on your towel, you can also ask/pay someone else to do it for you.
I am a huge fan of embroidery, and I would recommend every sewist to learn how to do it, as it not only makes your designs look amazing, but it’s also a whole lot of fun to do.
Conclusion
Congratulations – you’ve made your first hooded towel! If you have more children, simply use the same method to make one hooded towel for each of them. If there’s an age/size difference between the kids, you can make hooded towels of different sizes, and then the younger ones can also inherit the bigger towels from the older ones.
A hooded towel is also a great gift for a friend who has just had a baby, or for family friends’ children in general.
It’s an authentic hand-made gift everyone will love and cherish, and it’s also useful and cozy.
I hope you had fun making this towel. If you’d like to discover some more tutorials, feel free to explore my website. Discover how to make fabric pumpkins, how to sew a blanket, or perhaps, how to monogram sheets and towels.
Last update on 2025-04-23 / Affiliate links / Images from Amazon Product Advertising API


