Yes, they are called dice bags, but they are useful for storing virtually any tiny, easy-to-lose objects.
I make dice bags out of leftover materials all the time because there’s always something to put in them, and why throw perfectly good material when you can use it for a relaxing sewing project?
If you’re a fan of board games, then you definitely need dice bags for dice, especially if we’re talking Yamb, Dungeons and Dragons, and other games where you use some 5 or 6 dice, or you can use these same dice bags to store cards or figurines for those same games.
Dice bags are also a great option for keeping your jewelry safe from losing it, for keeping your makeup in one place, but also your tools, cosmetic products for traveling, etc.
One of my favorite ways to use them is as a gift package for a friend. That way they get both the gift and a thoughtful, handmade gift by you.
The good news about dice bags is that you can use literally any type of material to sew them. How they end up looking depends on how cool your material and its pattern look.
In this article, I am going to teach you all I know about making dice bags. To be honest, my grandma taught me how to make the first one, so over time, I have developed my own system of making dice bags, where I slightly modified the system.
Are you ready? Let’s dig in.
Dice Bag Basic Supplies
These are some of the basic supplies you are going to need for making dice bags. Of course, I would also add decorations to the list, such as decorative buttons, glitter, and other things, but you can skip this if it’s not your style.
- Exterior fabric;
- Lining fabric (optional);
- Ruler;
- Drawstring (you can also use yarn);
- Tailor chalk, pencil, or marker;
- Safety pins;
- Sharp scissors;
- Thread and needle.
Making a Dice Bag: Step by Step Guide
If you have all of these simple sewing supplies at hand, it’s time to start sewing! Let’s go step by step.
Measuring and Cutting
Making a dice bag begins the same way like many other sewing projects: by measuring and cutting.
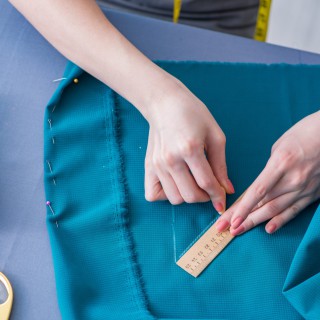
There are no specific rules on how big the pieces should be. You can customize them to the objects you intend on using them for. I have no particular advice on the topic of size. I most commonly use these bags for storing smaller objects, so I cut them like this:
- 10-12 inches x 5-7 inches for the bag body;
- 5-7 inches (circle shape) for the bag bottom.
I only make smaller bags than these if I plan to put dried plants inside like lavender and then toss them around my wardrobe, or for keeping rings inside. I have many rings as that’s my favorite type of jewelry, so I like to keep them organized in tiny pouches.
Then, you’ll need up to 16 inches of a drawstring. Of course, if you plan on making a huge dice bag, you’ll need a bigger string as well. How big a string do you need? Well, try laying it flattened out alongside the top of a bag body. The string should be a few inches longer for easier maneuvering, but if you find it to be too long, you can always cut it down with scissors.
Sewing the Bag
Now the part you came here for in the first place: sewing the bag!
- Take the piece of fabric intended for the outer part of the bag body and half fold it.
- Take the marking tool or tailors chalk and make a mark exactly one inch from the upper edge.
- Then, some ½ inch below that mark (the one from step 2), make another one.
- Take a pin and pin the fabric.
- Finally – time to sew your piece. Don’t stop sewing until you reach the first mark you made with chalk.
- Are you there yet? Now make a cut right there. This is where you’ll insert the string.
- Continue sewing from the next mark.
- When you’re done sewing the exterior part, fold the lining piece in half, just make sure that it’s also a body piece, and sew.
- When you’re done, take the bottom circle and attach it to both the exterior and interior piece. Keep in mind that for the outer side, the bottom is located opposite from the string hole! It’s quite crucial that you do this right, as you’ll lose time unsewing and correcting it.
- Now, once assembled, take the exterior and turn the right side out. The lining should be kept inside out. Put the exterior in the lining and pin the upper edge leaving an opening of some two inches.
- Start sewing again.
- When you’re done, use the small hole to turn the bag inside out through it. If you feel like it’s stiff, ironing it just a little bit can soften it up and make it nicer.
- Then, pin the two-inch hole and hide the edges by folding them. Make a stitch on the upper end.
- Now, do you remember the string hole you made in the beginning? Find it and make a few pins alongside the hole at the bottom.
- Once again, sew around.
- Now use a safety pin for easier maneuvering and attach it to the string.
- Use it to put the string inside the bag.
- Feed it through until it reaches the opposite side.
- Once you’ve pulled the string through, take the safety pin off.
- Tie up the string’s ends and voila – your dice bag is ready to be used!
If you prefer working with a pattern, you can also download this free sheet designed by Hellosewing.com, and use it to make a cool dice bag.
Conclusion
That’s all folks! Making a dice bag is pretty simple, I hope you enjoyed the process. Remember, never through away your sewing project leftover fabrics, as you can always use them for simple and relaxing projects like this one.
It’s much better to always have a dice bag at hand in case you need one than to throw away fabric scraps.
For more tutorials like this, visit the “How-To Guides” page on my website, and learn more about fixing a large hole in a leather couch or fixing ripped jeans.


