There are a number of justifiable scenarios in which you might have to hem a dress. One of those is of course when you order a dress from an online shop, see that it’s cut a bit longer than your liking upon arrival, and decide that you cannot bother with returning it. Can you be considered lazy? Yes. Is it understandable? Also yes.
Another justifiable scenario is when you have two daughters and one of them grows out of her fabulous dress that is still in perfect condition – so, if you hem it, your younger daughter, who gives you headaches because she wants a new dress, can have it. It’s a pretty good deal, especially considering how expensive it has become to have two kids nowadays.
However, the most justifiable scenario is when your grandmother insists that you should have the chiffon dress that has sat in her wardrobe without being worn for half a century. When you try it on, you see that it’s a little big for you, but its style, cut, and color(s) are so perfect that you don’t want to let this wonderful opportunity go. Your grandma, being the wise old woman of the family, can perfectly see your hesitation and says: “You can hem it as you like, my dear,” and you are too embarrassed to confess: “But–but–grandma, I don’t know how to!”
Well, worry not, because by the time you’ve finished reading this article, you’ll know everything that you need to get started.! Whether it’s a polyester or chiffon dress, after reading this post, you’ll be able to hem it with your bare hands!
How to Hem a Dress by Hand: A Step-by-Step Guide
Step 1: Try It On
You probably covered this step before albeit a little bit differently.
Whenever I acquire a dress that is not an exact fit for me, I wear it and negotiate with my mirror whether it’s still wearable without needing to hem it. Am I lazy? Yes. Is it understandable? No – because at the end of the time spent in dire confrontation with my mirror image, I always end up measuring where the new hem should be and marking it.
Of course, during this step, I always wear the shoes I am considering to be the perfect fit with the dress, and I recommend you do the same. Don’t forget to remove them after marking the location for the new hem, though, because it’s quite difficult to get to work when you are admiring yourself in the mirror in heels.
Step 2: Mark the Hemline and Cut the Extra Fabric
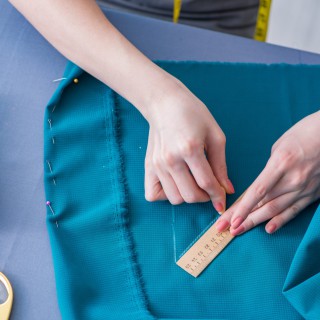
You can always complete the first step with the dress inside out because you’ll eventually have to turn it inside out to mark a hemline based on the measurement you made, but that’s not strictly necessary. You should probably have a ruler ready for marking the line, because drawing it evenly is imperative.
Then, you should draw another line two inches below the first line you made – that will be your cutting line. You may still use the ruler to ensure you are cutting it straight, if you don’t trust yourself to cut a straight line with scissors.
Also, make sure you are drawing those lines with a marker that can dissolve when washed – a fabric chalk, if you have one, is best.
Step 3: Fold the Edge and Secure It
Fold the edge for two inches so that the hemline becomes the bottom of the dress and secure it in place with pins vertically placed along the edge about every four inches. This will prevent it from coming undone, which would require you to measure and fold it again.
Step 4: Prepare Your Needle and Thread
You probably have the thread you’ve been thinking of using on the dress and your sewing needle ready by this time. Preparing them means the arduous act of trying to thread the thread through the eye of the needle (and, no, you are not allowed to listen to Sia during this step). Tie knots on each end of the thread to secure it.
Concerning pants and shirts, I said you don’t need a thread the same color as the hemmed material, but I will not say that about a dress. If you like a dress as much as you want to hem it, then you should pick the color of the hemming thread as carefully and befittingly as possible. Otherwise, it would be sacrilege.
Step 5: Get to Stitching!
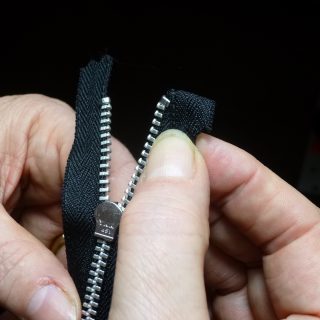
Remember that the dress is still inside out and thread the needle through the top corner of the folded fabric. Starting this process on one of the vertical seams of the dress could prove beneficial. Once you are through, pull it all the way until the fabric meets the knot at the other end of the thread.
Now we have arrived in a forking path because there are three stitching processes you can choose from while hemming your dress.
One of them is invisible stitching, which aims that the hemming thread remains invisible on the right side of the dress. I personally don’t recommend it because it’s too much work and the end-result will not be solid at all. Another option you have is applying running stitch on the hem. Although the new hem will be as sturdy as it gets in the end, a running stitch will be visible to the naked eye from an alien spaceship in search of intelligent life.
The only option that remains and my personal recommendation is backstitching the hem. With backstitching, you’ll achieve the perfect balance between sturdiness and neatness.
Step 6: Tidy It
No matter how good your stitching is or how neatly you work, there will always be some loose threads hanging around and loose fabric winking at you from behind the hem. Better trim them and show them who is the boss.
Step 7: Iron It
Of course, this step cannot be applied to all dresses, but if the dress you just hemmed can hold ironing, then you should iron it, because there is a big chance that it got creased in the process of hemming and because the new hem needs to be pressed.
Step 8: Try It On Again!
Trying the dress on again is not actually only another step of the hemming process in which you estimate how good a job you have done or whether it requires further work, but also an act of self-care. If everything has progressed in accordance to the plan, there should be nothing stopping you from admiring your image in the mirror and thank them for not backing off while negotiating the need for a new hem.
You may also run to your grandmother with your dress on to have her congratulations on both your skills and elegance. Then, both of you might pay a visit to your mother, who had once upon a time turned her nose up at the dress when your grandma offered it to her. Seeing your mom getting scolded about being a snob or having never learned hemming might prove more fun than you could have thought. However, this is only an optional part of our eighth step and definitely not a must.
Step 9: Oops! You Just Forgot About Sleeves!
I obviously cannot know whether the dress in question has any sleeves or whether those sleeves are long enough to be hemmed, but if there are and if they are long enough, they probably need a good old hemming as well, because otherwise, you’ll have altered the cut of the garment.
You need not worry, though. Hemming sleeves is generally just repeating the first seven steps above on a smaller scale, twice, and after that, you are done, I promise.
Final Words
There is a reason why I started this post with a dress that has occupied your grandma’s wardrobe for half a century – it’s a miracle because we are now well used to throwing away clothing that doesn’t fit us anymore or that we don’t know why we bought it (hi there, consumerist society!). Do you know how much textile goes to waste as a landfill or is shipped overseas to Middle East or Far East Asia to be allegedly recycled? 85% percent of all textiles. A fair number of those are garments never even worn.
What if you learned hemming and what if you hemmed those dresses, pants, and shirts that are taking up space in your household and that are eventually going to go to waste? Of course, in the end, you wouldn’t be saving the world or single-handedly preventing the climate crisis, or the waste crisis or the consumerist crisis, but you’d be doing some good for the planet that has homed us since we began.
Moreover, you’d save a lot of money and even start making money if you opt to sell new garments hemmed from old and inactive ones, so that they can continue their inactive existence in other households and be thrown away when they are miraculously noticed on one fine day.


