Whether you are trying to wade through a global pandemic in style (and without much concern about keeping the viruses out) or you are the personal bodyguard of a drug lord who has to travel through dust for business trips, a gaiter mask should be a cardinal piece of your arsenal. Of course, you can easily find one on Amazon that will effectively serve its purpose, but they are produced in such a uniform manner that there is a big possibility you are going to be arrested for aiding and assisting drug trafficking even if you are not in the business (yet). Therefore, learning how to sew a neck gaiter face mask with your own unique interpretation embedded in it might prove useful.
Furthermore, these masks might seem and sound as if they are ornamental items at first, but once you sew and start using one, you’ll see that they are practical in many ways. Yes, when they are employed as masks, they can be ineffective due to the base material and the emphasis on style rather than protection in their making. However, they can also easily be turned into a headband or an infinity scarf that will protect or conceal your neck if need be. If your best friend is hitting on a stranger in mortifying ways while you are sitting at a bar together, you may also cover your eyes and ears with a gaiter mask. That, I believe, is alone worth the effort of sewing one.
How to Make a Gaiter Mask: A Step-by-Step Guide
Step 1: Pick a Pattern
If or when you are an experienced seamstress or seamster, you can create your own pattern and experiment on the style and cut as much as you like, but running a website on sewing requires assuming that the reader is a beginner. Therefore, I recommend you take a look at all the patterns provided online for free. Once you decide on a pattern, download and print it.
Step 2: Place the Pattern on Fabric and Cut
For me, the most important and fun step of any sewing project is picking the fabric – luckily, there are many wonderful 4-way stretch fabric options on Amazon to pick from, which is the ideal fabric for making gaiter masks. Also, make sure that the cotton portion of the fabric you choose is over at least 90% and it’s breathable overall so that your neck and face don’t suffer from itches or pimples.
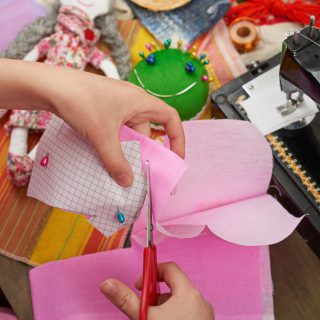
Once you have the fabric you want and once you are sure that it meets all of your requirements, you can place the pattern on it and start cutting the fabric with scissors in line with the pattern. Be aware that the fabric should be folded in half with its right side on the outside when you are cutting it.
You’ll have to cut two pieces, one for the mask and one for the filter (this might be optional depending on how you are planning to use the mask), so make sure that you purchase ample fabric to make sure that it’s enough and to be ready for possible mishaps.
You can also opt for making a two layer mask. If you do so, you’ll have to cut two identical pieces for the main mask.
Step 3: Position the Optional Filter Pocket
If you want a filter pocket on your mask, now is the time to position it. Place the fabric flat on a surface where its inside is turned towards you, and position the filter (a little cut from the fabric enough to cover your nose area) an inch or so below the upper line of the front of the mask and in the center on the horizontal scale so that it coincides with where your nose is on your face, and secure it in place with sewing pins.
You may stitch the filter pocket after securing it or you may do that during or after the fourth step. Just make sure that the upper edge of the pocket remains unstitched so that you may slide the filter in when you are done with sewing and be able to remove it for washing.
Step 4: Hem the Mask
In case you are an avid reader of my website or you know someone who is, you probably know by now everything about hemming, because we hemmed everything together here, didn’t we? Pants, shirts, dresses, and what have you… So, hemming a mask is no different at all.
Just fold the up and bottom edges of the mask inwards half an inch or so, secure it in place using sewing pins on every four inches, and start stitching forth while removing the pins on the way.
Did you opt for making a two-layer mask? Then place both fabric you have cut as their inside face each other and fold the edges of both fabric to create the hem.
Step 5: Seam the Mask
By the way, I have the music sheet and lyrics for a post-punk song titled “Hem the Mask, Seam the Mask”, which is all about the vocalist (preferably a woman) slowly building into a crescendo while repeating these words as if it’s a mantra and while the guitars are getting more and more violent and the drums are imitating the sound that a sewing machine makes when worked on full throttle. If you are a member of a band that can pull it off, just drop me a comment.
Getting back to sewing, though, this step is pretty straightforward. After hemming the up and bottom edges of the mask, you have to bring together its sides to achieve circularity and infinity and seam them together with a ⅜” allowance.
Backstitching the beginning and the end of the seam is going to render the end-product sturdier.
Step 6: Iron It
Remember that I recommended using a 4-way stretch fabric. Well, during the process, it might have stretched here and there quite unevenly. So, you shouldn’t worry if it looks weird and like you have done a bad job of sewing when you are finished with the fifth step. Just press the mask with an iron and it will regain its composure in no time.
Moreover, mind that ironing the seams and hems with steam showers and a hot iron is of crucial importance for any sewing project.
Step 7: Wear It and Ride Through the Desert on a Motorcycle
To test the quality of the neck gaiter mask you just sewed, you have to ride a motorcycle through dust and under direct hits from the sun. The part where you ride through dust is important to measure how well it protects your nose area, and getting direct hits from the sun should give you a pretty good idea if your neck is going to get sunburned or not. Of course, to achieve these ends, you should ride in a safe area without a helmet and preferably with a faux leather jacket – faux, since you care about wildlife.
Tools You Need for Making a Gaiter Face Mask
I have already bolded the tools you need for making a gaiter mask while guiding you through, but let me just reiterate what those are in order of importance:
- Sewing machine and needles
- Fabric, for well-known reasons
- Thread, imperative for stitching anything
- Scissors or fabric blades, to cut fabric
- Sewing pins, for securing hems, pockets, and seams
- Markers, like chalk that will dissolve upon washing
- Filter, if you care about your health
Final Words
A gaiter mask might seem like a conspicuous item requiring too much self-confidence or a high tolerance for tedium at first, but once you have a reliable pattern and suitable fabric at your disposal, you’ll see that it’s quite easy to sew – especially after you’ve read my guide. It’s quite a stylish and practical item that might also serve other purposes like that of a headband or scarf. Moreover, if you include a good filter in your design, it will offer great protection in the face of pandemics, which is a reality we have all become well acquainted with now.
We should also accept that masks are now an essential element of the fashion sphere. Therefore, I can tell you from experience that it feels really cool to go out and socialize with a mask you have sewn yourself. There are only a few things that match the tingling sensation you get when people ask you: “Oh, what a great mask you have – where did you get it?”, and you answer: “Well, I made it myself”, and they congratulate you in envy and hesitation whether they can ask you if you could also make one for them. You can, of course, if they are willing to pay for your labor.
Last update on 2025-04-14 / Affiliate links / Images from Amazon Product Advertising API


